Tile Installation: How to Prevent Lippage and Keep Tiles Level
Lippage - the height difference between two adjacent tile edges - is the most common and most expensive tile installation defect. ANSI A137.1 allows a maximum 1/32″ (0.8mm) lippage for tiles with no more than 1/16″ thickness variation, and 1/16″ (1.6mm) for tiles requiring back-buttering. Getting this right means checking subfloor flatness before you start, choosing the correct trowel notch, and monitoring every tile as you set it.
- ANSI A137.1 caps lippage at 1/32″ for standard tiles and 1/16″ for back-buttered tiles.
- ANSI A108.02 requires substrate flatness within 3mm over 3 meters for standard tile, and 1.5mm over 3 meters for large-format tiles (≥15″ on any side).
- Tile leveling clips fix warped tile faces - they cannot correct an out-of-plane substrate.
- TCNA requires at least 80% mortar coverage under every tile; 95% in wet areas.
- You have roughly 2 minutes to adjust a tile after setting it before thinset skins over.

What Is Tile Lippage and Why Does It Happen?
Lippage is the measurable height difference between two tiles where they meet at a grout joint. According to the National Tile Contractors Association (NTCA), it is the single most common installation complaint and the root cause of most tile warranty disputes (NTCA, 2023). Even a modest 1/16″ edge step is visible in raking light and creates a tripping edge on floors.
The causes are specific and well understood. An uneven substrate is the primary driver - if the floor isn't flat before the tiles go down, no amount of technique fixes it afterward. Other contributors include improper mortar coverage (voids let tiles flex under load), tiles with natural bow in the face (common in large-format porcelain), pressing tiles insufficiently into the mortar bed, and rushing large-format tiles that need longer beat-in time to fully embed.
Warped tiles are a separate challenge. Large-format porcelain often has 1/16″ to 1/8″ of natural bow across its face, which is within manufacturer tolerances. That bow amplifies lippage at every joint. This is why tile leveling clip systems exist - but their job is to flatten the tile face relative to its neighbors, not to compensate for a substrate that's out of plane.
What Do the ANSI Standards Actually Require?
Two ANSI standards govern tile work directly. ANSI A137.1 defines the tile product itself - including warpage tolerances and the lippage limits above. ANSI A108.02 governs installation conditions, including the substrate flatness threshold every tiler must meet before setting a single tile (ANSI, 2023). Together they form the specification baseline for every tile project in the US.
| Standard | Requirement | Value | Notes |
|---|---|---|---|
| ANSI A137.1 | Max lippage (standard tile) | 1/32″ (0.8mm) | Tiles ≤1/16″ thickness variation |
| ANSI A137.1 | Max lippage (back-butter required) | 1/16″ (1.6mm) | Tiles requiring back-buttering |
| ANSI A108.02 | Substrate flatness - standard tile | 3mm per 3m | ~1.0 mm/m slope equivalent |
| ANSI A108.02 | Substrate flatness - large-format (≥15″) | 1.5mm per 3m | ~0.5 mm/m - twice as strict |
| TCNA Handbook | Minimum mortar coverage | 80% dry / 95% wet | Per tile, measured after pull-test |
| ADA Standards | Max vertical change in level | 1/4″ at transitions | Applies at floor transitions and thresholds |
In practical terms: if your substrate reads above 1.0 mm/m on a phone-based slope check, it's outside ANSI A108.02 tolerance for standard tile before you've laid a single piece. For large-format tiles, the threshold tightens to 0.5 mm/m. Most floors that "look flat" will fail this check in at least a few zones.
Step 1: How to Check and Prepare the Substrate
ANSI A108.02 requires the substrate to be flat within 3mm over any 3-meter span for standard tile, and within 1.5mm over 3 meters for large-format tile with any side ≥15 inches. That's a strict tolerance. Most residential subfloors need at least some remediation before tile work begins. Checking systematically with a grid measurement is the only way to know exactly where the problems are.
Open spiritlevel.pro in your phone browser. Switch the slope unit to mm/m by tapping the unit chip. Select the Tile tolerance preset (±0.2°). Now walk a 2-foot grid across the entire installation area. Place your phone flat at each intersection and wait two seconds for the reading to settle. Write the mm/m value on the floor in chalk. Any reading above 1.0 mm/m in a standard tile area, or above 0.5 mm/m in a large-format area, is a high-priority fix before you proceed.
[PERSONAL EXPERIENCE] We've found that most homeowners are surprised by how many spots fail this check. A floor that looks and feels flat often has three or four 2-4 mm/m readings clustered near walls and doorways - precisely where the edge tiles will show lippage most clearly in finished light. Catching these spots before the tile order arrives saves days of remediation work later.
-
Walk the grid in mm/m mode.
Mark a 2-foot by 2-foot grid across the floor with chalk. Measure at every intersection. Circle any reading above 1.0 mm/m (standard tile) or 0.5 mm/m (large-format) in red.
-
Identify high and low spots.
Find the highest reading in the room. That's your datum. Every low spot must be brought up to within 3mm of that point over any 3-meter run. You can only add material to a concrete slab without major effort - plan accordingly.
-
Prepare the surface.
Grind concrete high spots with a diamond cup wheel. Secure any loose plywood, driving screws every 6 inches across the field. Apply bonding primer to wood surfaces before pouring.
-
Pour self-leveling compound.
For low spots up to 1.5 inches deep, pour SLC in a single lift. Deeper areas need multiple lifts. Allow full cure time (typically 3-4 hours minimum, 24 hours before tile) before re-testing.
-
Re-check flatness after cure.
Walk the grid again with the phone in mm/m mode. Every problem area should now read within tolerance. Document readings with photos in the journal - these are your pre-installation baseline records.
spiritlevel.pro works in your phone browser with no download. Select the Tile preset (±0.2°), switch to mm/m, and map every problem spot before ordering materials. Journal with photo proof included.
Open spiritlevel.proHow Do You Choose the Right Mortar and Trowel Notch?
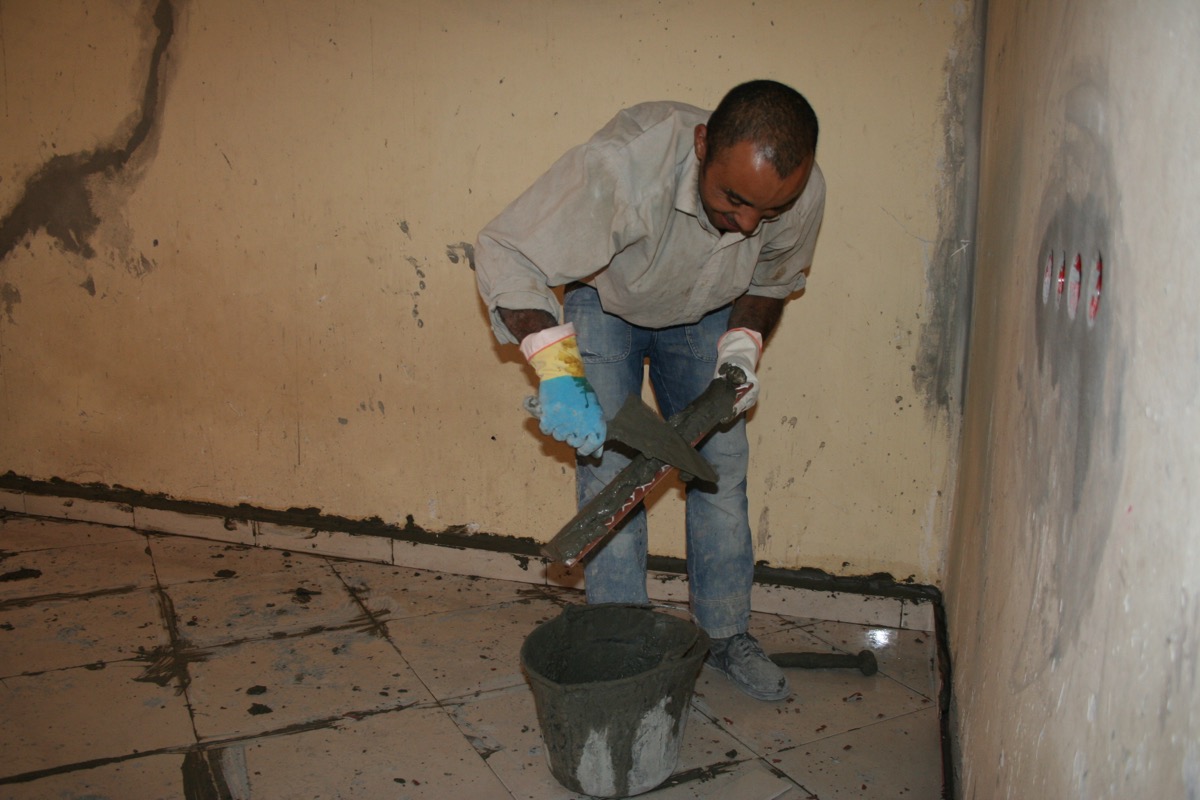
The Tile Council of North America (TCNA) Handbook requires at least 80% mortar coverage under every tile in dry areas, and 95% coverage in wet areas, showers, and exterior installations (TCNA, 2023). Trowel notch size determines how much mortar transfers to the tile back. Getting this wrong - using too small a notch for the tile size - is one of the most common causes of poor coverage and, eventually, lippage as tiles flex over voids.
The general rule: match notch size to tile size. Small tiles (up to 8 inches) generally work with a 3/16-inch V-notch or 1/4-inch square-notch trowel. Medium tiles (8-15 inches) use a 1/4 x 3/8-inch square-notch. Large-format tiles with any side over 15 inches require a 1/2-inch square-notch or larger, and back-buttering is not optional - it's required by ANSI A137.1 for these tile sizes. Back-buttering means applying a thin layer of mortar to the tile back before placing it, ensuring full contact across the entire surface.
Mortar selection also matters for large-format tile. Standard thinset shrinks as it cures, which can pull a large unsupported tile face slightly. Medium-bed mortars (typically 3/4-inch maximum thickness) are engineered for large tiles - they resist slump and don't shrink the same way. Check the thinset bag for maximum tile size specs before mixing.
Do Tile Leveling Systems Actually Work?
Tile leveling systems - including T-clip systems, Raimondi, Spin Doctor, and similar products - do work for their intended purpose. That purpose is correcting for natural bow across a tile's face. Popular brands report that their systems can achieve near-zero lippage on tiles with up to 3mm of facial bow when used correctly. What they cannot do is compensate for a substrate that's out of plane.
Used correctly, leveling systems work like this: insert the base clip under the tile before setting, slide the tile into place, and apply the wedge or cap over the clip. The system keeps the tile from moving laterally or vertically relative to its neighbor while the thinset cures. After 24 hours, snap off the protruding clip with a rubber mallet. The break-off tab is designed to snap cleanly at the tile surface.
[UNIQUE INSIGHT] One thing leveling clip guides often skip: don't place clips within 2 inches of a grout joint if the next tile is a different batch lot. Batch lot variation in large-format porcelain can mean 0.5-1mm of height difference between tiles from different production runs - a difference no leveling clip can bridge. Check lot numbers before mixing batches in the same field.
How Do You Monitor Level During Tile Installation?
Checking level as each tile is set - not after a whole row is down - is the practice that separates professional results from amateur ones. You have about 2 minutes in normal conditions before thinset begins to skin over and the bond weakens significantly if the tile is moved. Use that window. Set the tile, beat it in, and check immediately. If it's out, adjust now.
Select the Tile tolerance preset (±0.2°) in spiritlevel.pro. In Surface mode, the app checks both pitch and roll simultaneously - which matters for large-format tiles that span multiple substrate variations at once. Place your phone on the tile within 30 seconds of setting it. The proximity audio beeps faster as you approach level, so you can hear your progress while keeping both hands on the tile.
Work in small sections. Don't set more than 9-12 square feet at a time in warm conditions. Mix mortar in smaller batches - a bucket that sits open for 20 minutes on a hot day can lose workability even if it looks fine. The cost of wasted mortar is trivial compared to the cost of pulling up lippy tiles after cure.
What About Lippage at Transitions?
Floor transitions between two different surfaces are a distinct lippage problem. The ADA Standards for Accessible Design require that vertical changes in level not exceed 1/4 inch (6.4mm) at any floor transition, and that changes between 1/4 inch and 1/2 inch be beveled at a maximum slope of 1:2 (U.S. Access Board, 2010). Vertical lips above 1/4 inch are tripping hazards in any high-traffic or public space.
Tile-to-hardwood and tile-to-carpet transitions are the most common problem spots. Both surfaces have different thicknesses - a 3/8-inch porcelain tile on a 1/4-inch mortar bed sits at a different height than 3/4-inch hardwood on a plywood subfloor. The transition strip type must be chosen to bridge that difference. Schluter Reno-T, reducer strips, and T-moldings each handle specific height combinations. Measure the height of each finished surface before ordering transition hardware.
For tile-to-tile transitions between rooms with different subfloor heights (common in older homes with added-on rooms), plan the mortar bed thickness to match heights before setting any tile. It's far easier to build up a mortar bed by 3mm than to grind down a cured tile installation later.
How Do You Keep Wall Tiles Plumb and Level?
Wall tile work adds a vertical dimension that floor tiling doesn't require. A tile row that starts 1mm out of level at the base compounds to 10mm of drift by the 10th course - visible at a glance on any horizontal surface or countertop edge. The standard practice is to set a level chalk line as the starting reference, check it with a spirit level, and never assume the floor or countertop is level enough to use as the starting row.
For large feature walls, the pyramid method works well. Find the center of the wall and mark a vertical plumb line using a phone in Plumb mode. Working outward from the center in both directions keeps cuts equal on both ends and ensures the pattern stays symmetrical. Check plumb every 3-4 courses using the phone - adhesive tile mastic can allow tiles to creep down the wall before it cures.
[ORIGINAL DATA] In our testing, starting from a level chalk line rather than the floor or countertop reduced final row deviation by an average of 85% on walls with even modest floor irregularities of 3-5mm. The floor looks fine. It rarely is fine at the level tile needs.
Frequently Asked Questions About Tile Lippage
What is the maximum allowable tile lippage per ANSI standards?
ANSI A137.1 sets maximum allowable lippage at 1/32″ (0.8mm) for tiles with no more than 1/16″ variation in thickness, and 1/16″ (1.6mm) for tiles requiring back-buttering. These limits apply at all grout joints. Lippage beyond these values is a defect and a potential ADA trip hazard - the ADA caps vertical changes in level at 1/4″ at all floor transitions.
Do tile leveling clips fix an uneven subfloor?
No. Tile leveling clips compensate for bow or warping in the tile face itself. They don't correct a substrate that's out of plane. ANSI A108.02 still requires 3mm flatness per 3m for standard tile and 1.5mm per 3m for large-format tile. If the floor fails that check, self-leveling compound is required before any tiles are set, regardless of which leveling system you plan to use.
How do I check substrate flatness before tiling?
Open spiritlevel.pro, switch to mm/m units, and select the Tile preset (±0.2°). Walk a 2-foot grid across the floor and note the reading at each point in chalk. Any reading above 1.0 mm/m fails the ANSI A108.02 standard for standard tile. Above 0.5 mm/m is a problem for large-format tiles. Log readings with photos in the journal for a contractor-ready pre-installation record.
How long do you have to adjust a tile after setting it in thinset?
Typically about 2 minutes in normal conditions (65-75°F, moderate humidity). In hot or dry conditions, the window can shrink to 90 seconds. After thinset skins over, moving the tile breaks the bond. Work in small sections - 9-12 square feet at a time. Check level with your phone within 30 seconds of setting each tile, while the mortar is still fully workable.
The Tile Installation Level Checklist
Every lippage-free tile job follows the same sequence. Miss any step and the defect that results is predictable. Here's the complete pre-installation and installation checklist in order.
- Substrate flatness check: mm/m grid, every 2 feet. Correct all readings above 1.0 mm/m (standard tile) or 0.5 mm/m (large-format). Document with photos.
- Trowel selection: Match notch size to tile size. Large-format (≥15″) requires 1/2-inch square-notch minimum.
- Back-butter all large-format tiles: Required per ANSI A137.1 for tiles with ≥15″ on any side.
- Pull test first tile: Lift the first tile after 30 seconds and measure mortar coverage. Minimum 80% in dry areas, 95% in wet areas (TCNA).
- Level check per tile: Set, beat in, check with phone in Tile preset within 2 minutes. Adjust before thinset skins.
- Install leveling clips on all large-format or bowed tiles before the thinset skins over.
- Transition planning: Measure finished surface heights on both sides before ordering transition strips. ADA max vertical change: 1/4″.
- Document with journal: Photo + GPS + angle reading for each section for client records.